Products InterphoneCloud intercom AccessDoors, lifts & gates AppFor every resident ContactWe reply within a day Manager loginSchonell Manager console Designed & made in Singapore · Since 2014
For building managers

Admin platform guide.

A step-by-step guide to running your estate from the Schonell Admin Platform. No software and no PC required, it works from a phone as well as a desktop. Looking for the resident app instead? See the app guide.

Getting started

The dashboard.

What you see after logging in, and what each part of it does.

Welcome to the Schonell Admin Platform. This is a step-by-step guide to running the interphone system for your estate.

No software and no PC are required. You can make changes from your mobile phone.

After logging in to your admin account and selecting your estate, you will see the screen below. As building administrator, everything you need is on this page.
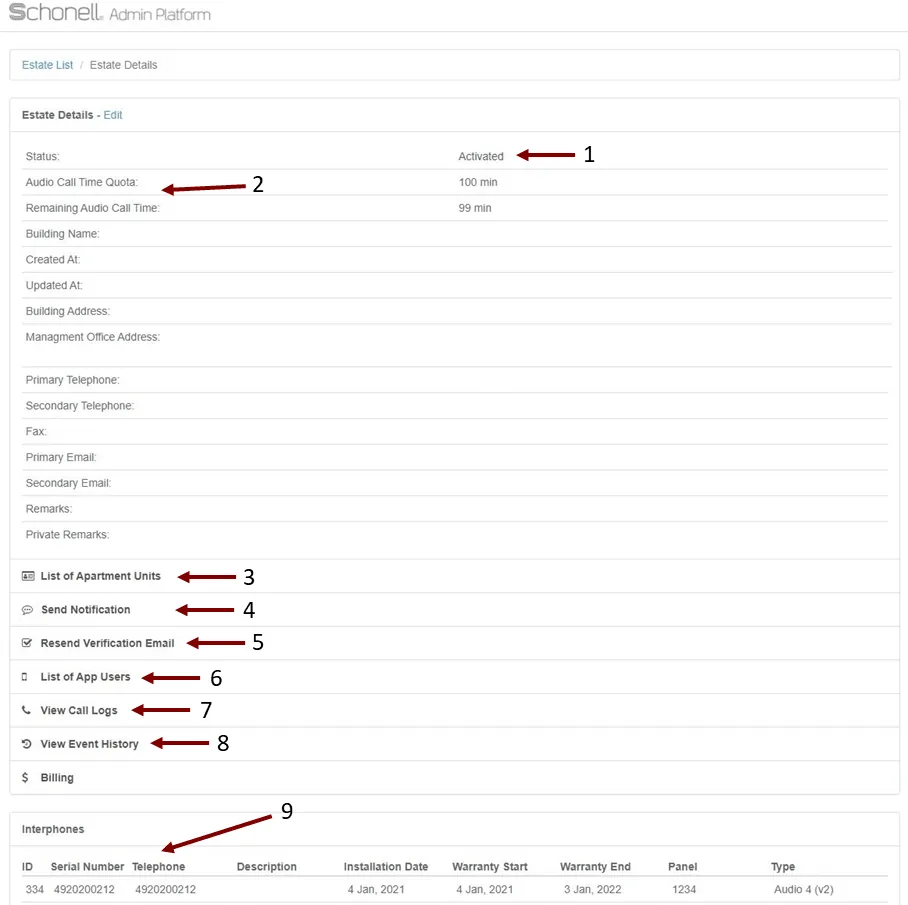
The estate dashboard in the Schonell Admin Platform, with the nine numbered areas described below
The estate dashboard. The nine areas are described below.
  1. Status: your estate’s status should read activated.
  2. Call talk-time and quota: the quota allocated for the month and the minutes remaining. Talk-time renews automatically on the first day of each month.
  3. List of units on your estate: the units and users programmed to your estate.
  4. Send notification: sends an app push notification to selected users.
  5. Resend verification email: re-sends the verification email by hand for an app user who did not receive one while signing up.
  6. List of app users: every app user connected to your estate.
  7. View call logs: every call log for every system on your estate, telephone calls and video app calls alike.
  8. View event history: the event log from the Schonell Access app, showing everyone who has granted access.
  9. Interphone list: every interphone connected to your estate.
Programming

Units and numbers.

Adding units, sending the data to the interphone, and changing numbers later.

To add a new unit:

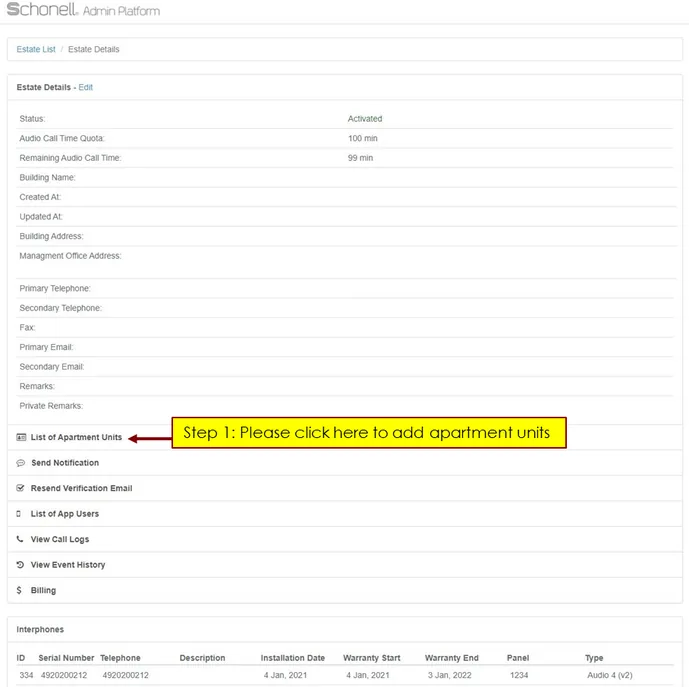
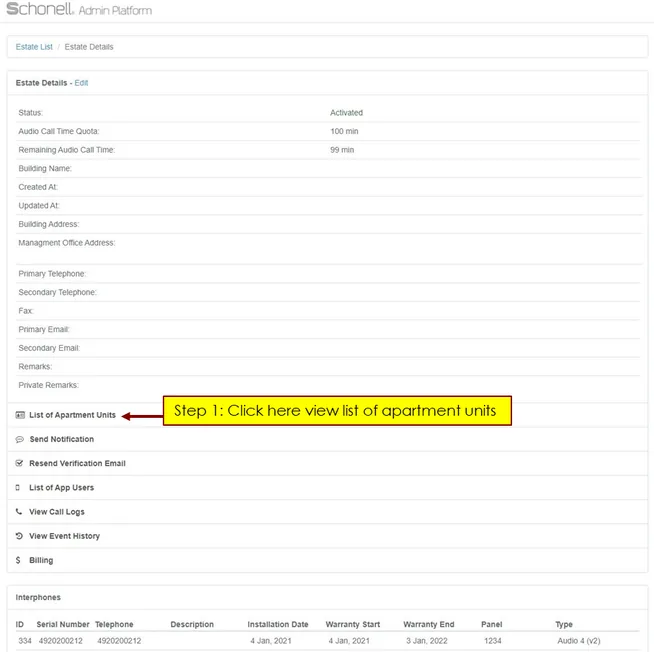
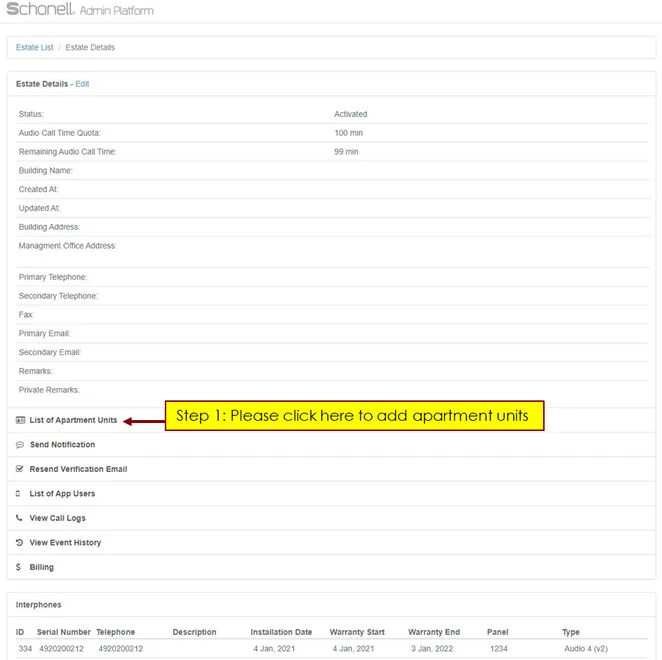
  1. On your estate page, click List of Apartment Units.
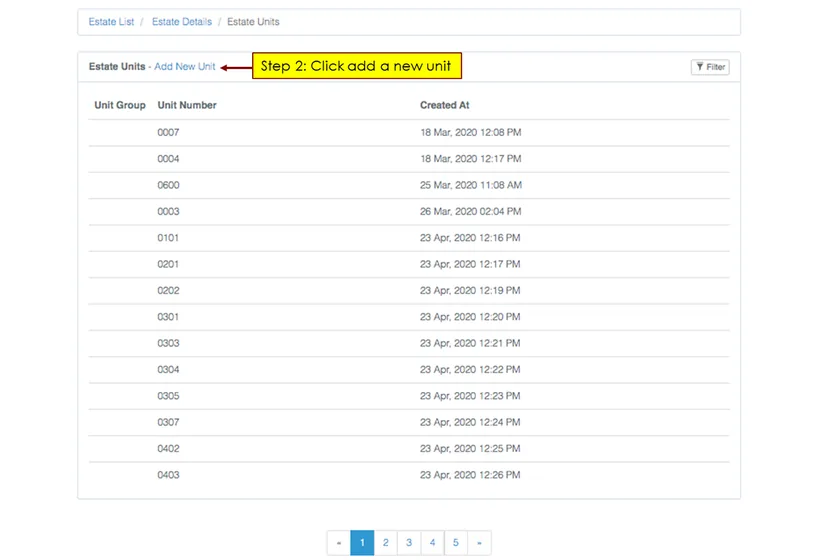
  2. Click Add a Unit.
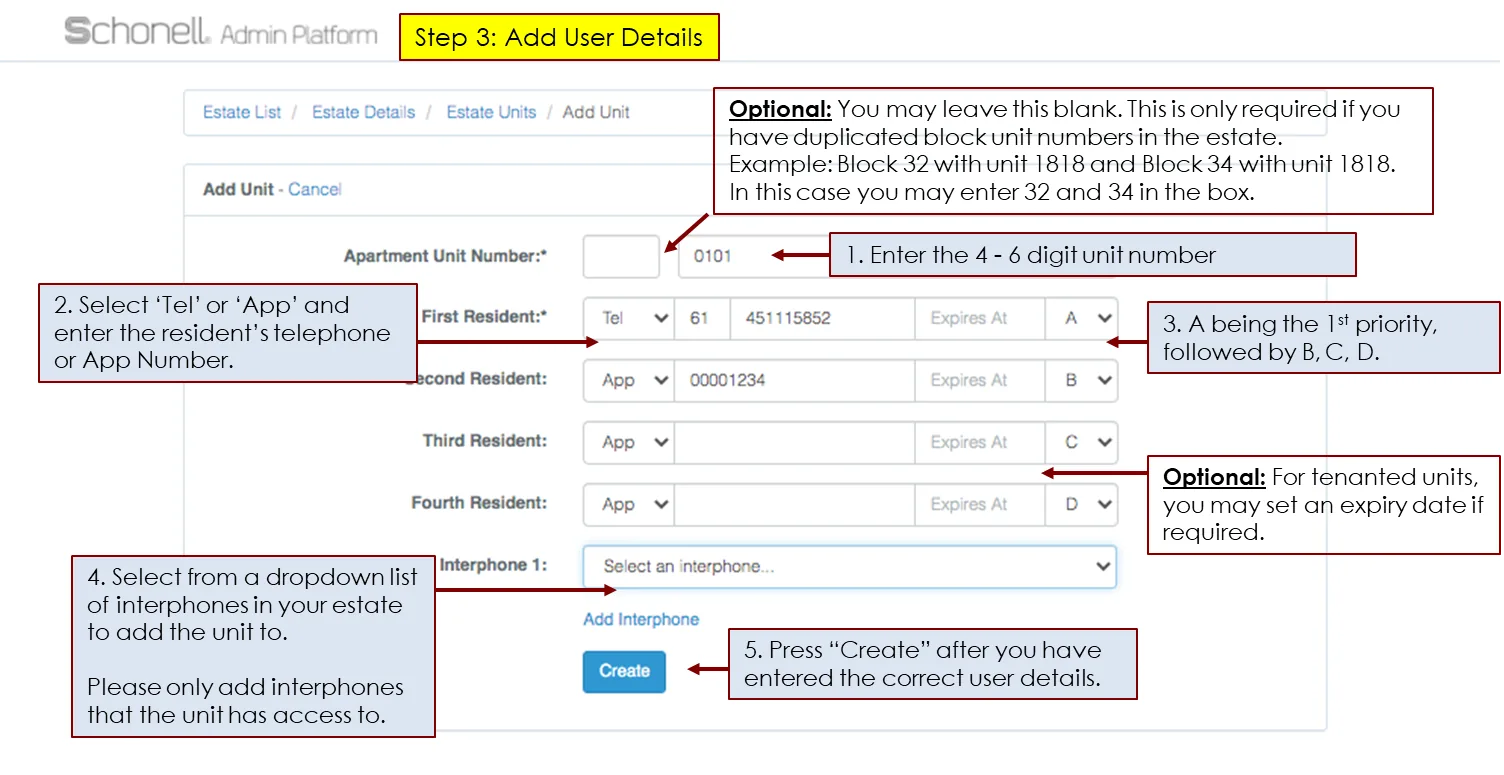
  3. Enter the user details and press Create.
List of Apartment Units in the admin platform
Step 1 — List of Apartment Units.
The Add a Unit button
Step 2 — Add a Unit.
The unit details form with the Create button
Step 3 — enter the details and press Create.
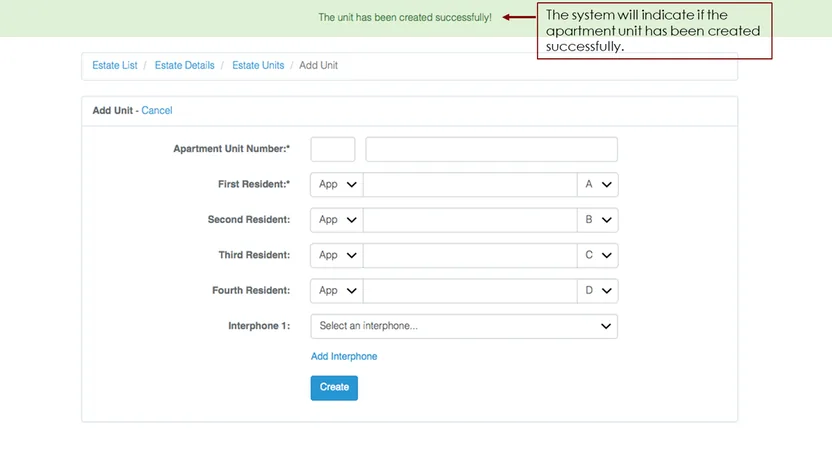
A newly created unit shown in the unit list
The unit once created.
Once every unit is added, you still have to send the data to the interphone. See Sending data to the interphone system below, nothing reaches the system until you do.

Send data to the interphone only after every unit has been entered correctly.

  1. Go to the Interphones page.
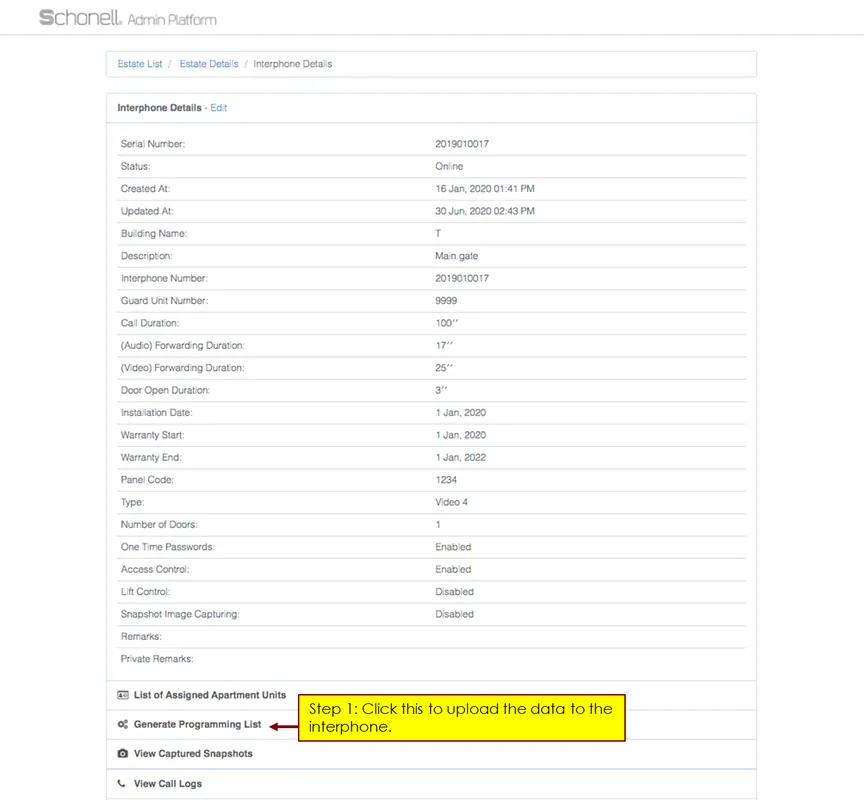
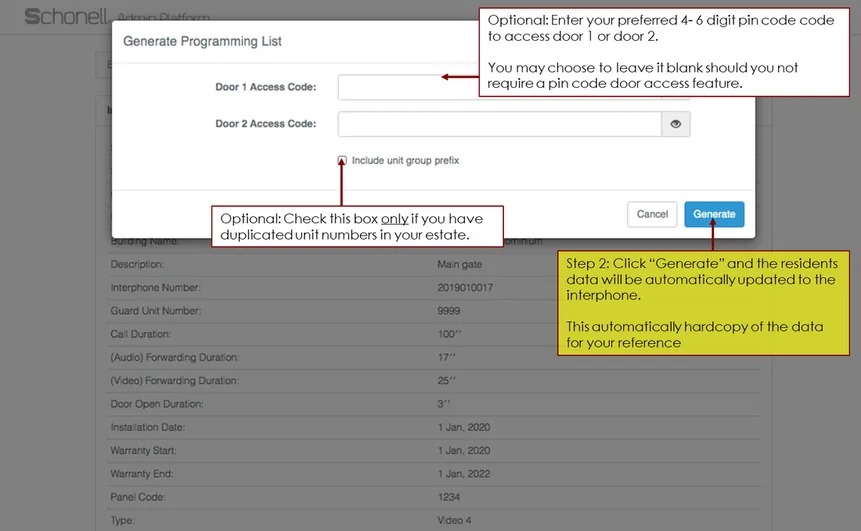
  2. Press Generate programming list, then Generate.

The data updates immediately. That is all there is to it.

The Generate programming list button on the Interphones page
Generate programming list.
The Generate confirmation step
Then press Generate. The data updates immediately.

To edit an existing unit:

  1. Click List of apartment units.
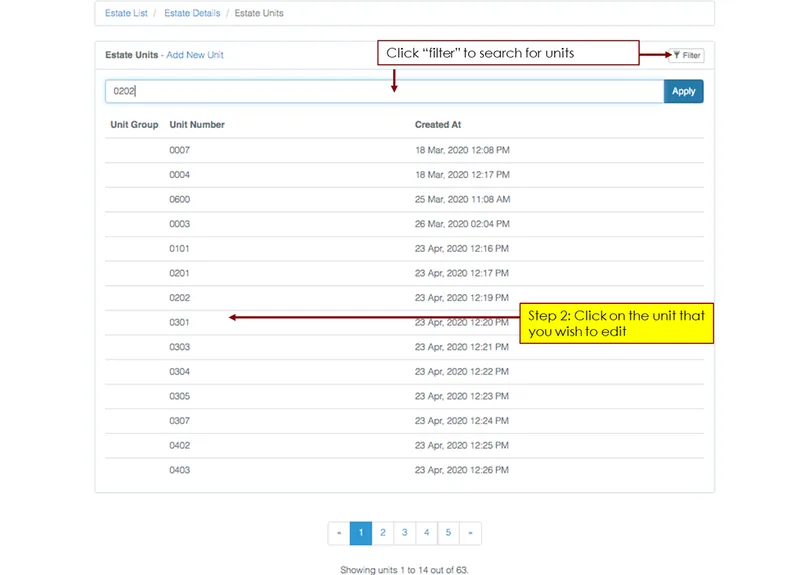
  2. Click the unit you want to edit or remove.
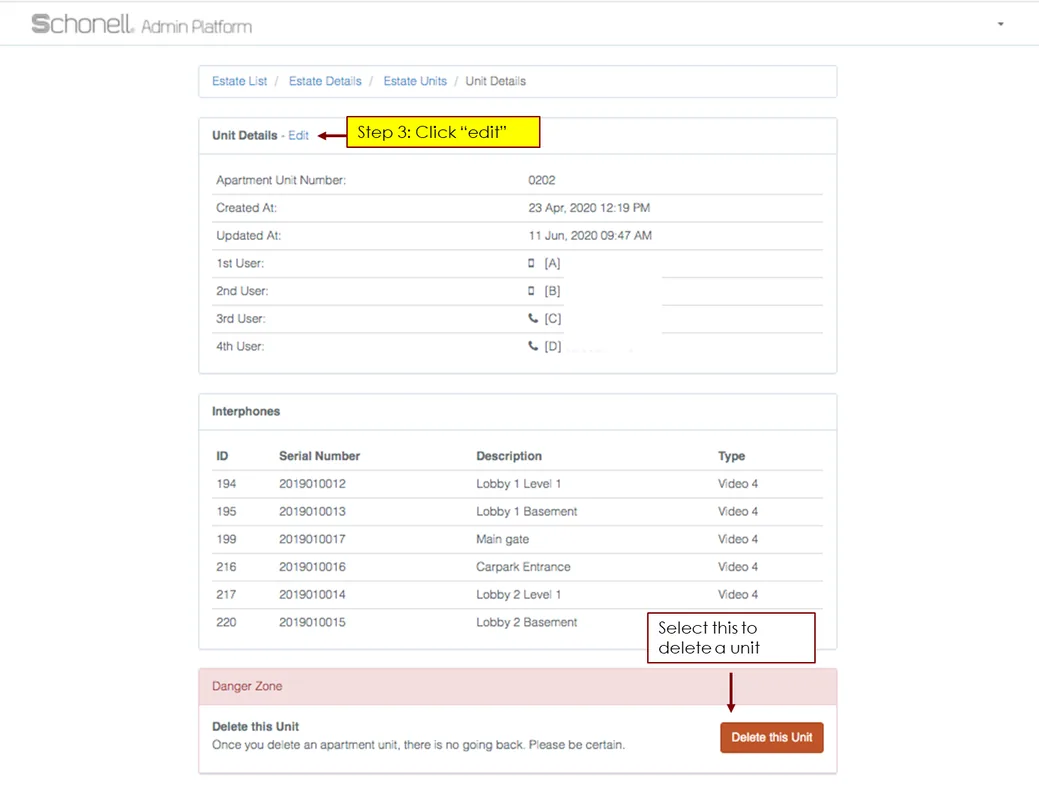
  3. Click Edit and change the numbers.
The unit list with a unit selected for editing
Step 1 and 2 — pick the unit.
The Edit button on a unit
Step 3 — Edit.
Editing the telephone numbers and app IDs on a unit
Change the numbers, then save.
Do not forget to send the data to the interphone once you have finished editing, or the system keeps the old numbers.
Everyday tasks

Day to day.

The things you are most likely to need in an average week.

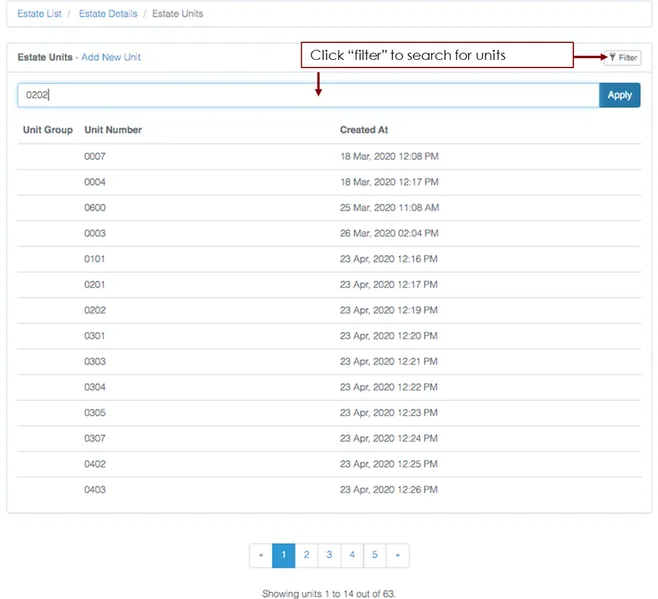
  1. Click List of apartment units.
  2. Type the unit number into the Filter field and press Apply.
The Filter field above the unit list
The Filter field.
Filtered results showing a single unit
Filtered to a single unit.

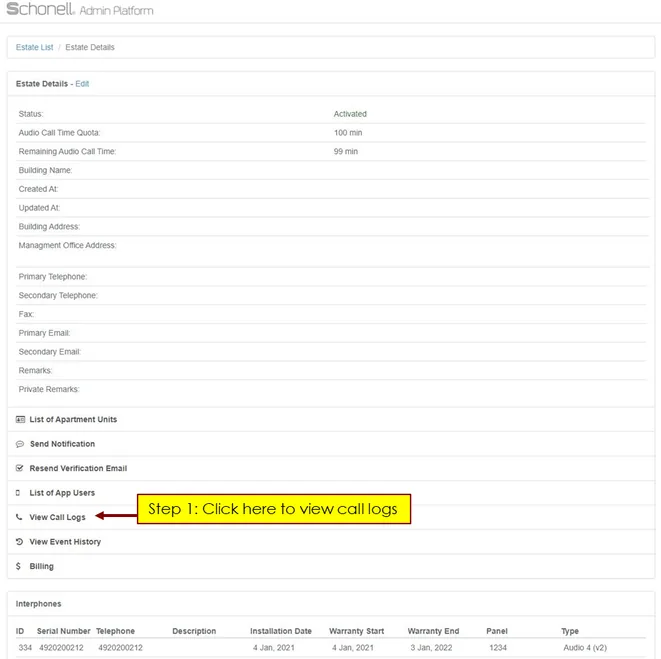
Click View Call Logs to see the call logs for the whole estate, or for one interphone system.

To find a particular unit, type the unit number into the Filter field and press Apply.

The call log view filtered by unit number
Call logs, filtered by unit.
This affects every user on the interphone system, not one unit. Setting the wrong duration can adversely affect how the system performs.
  1. On your estate page, click the interphone system you want to change.
  2. Under Interphone details, click Edit.
  3. Change the call duration and the call forwarding duration, then press Update.
Do not forget to send the data to the interphone afterwards.
Troubleshooting

When something is wrong.

Start here before raising a support request.

There are a few reasons the system may not be working as it should:

  1. The system is out of audio landline talk-time credit for local calls.
  2. An app user’s settings are misconfigured.
  3. The user is not programmed into the system.
  4. The system is offline.

If none of these is the cause, contact us and a representative will assist you.

Need a hand?

We’re one message away.

Tell us your estate and a short description of the problem, and we’ll take it from there.

Contact support